Best Fish Finders for Inshore Flats Fishing: Why "More Powerful" Is the Wrong Question in Two Feet of Water
The grass edge disappears under wind-ruffled water, the skiff slides sideways in eighteen inches of falling tide, and the screen shows a depth number that tells you almost nothing about where to cast next.
The quick answer
The Humminbird XPLORE 9, ordered with its matching side-imaging transducer, is the best fish finder package for inshore flats fishing. It is the one system here where the imaging transducer is specified alongside the nine-inch display rather than left as a separate guess, which is what decides whether you can search the edge beside the boat instead of the few feet of bottom under it. An angler who ranks coastal chart detail above side-imaging range should buy the Garmin ECHOMAP UHD2 94sv instead, provided the compatible SideVu transducer is explicitly listed on the order rather than assumed from the model name.
Every judgement below comes back to one question: can the transducer mount high enough to clear your hull and still show you the edge you are trying to fish?
Affiliate disclosure. ReefReadyGear earns a commission on some links below at no extra cost to you. This guide draws on manufacturer product and support pages plus NOAA charting and tide sources, checked September 12, 2026, and it is a researched buying guide rather than a claim of first-hand testing.
Mount height decides more than megahertz
In water this shallow, what decides whether a fish finder actually works is whether the transducer can mount high enough to stay useful without becoming the hull's lowest exposed fitting, whether the beam looking straight down is even wide enough to matter at two to four feet, and whether the side-imaging beam, which is a different piece of geometry entirely, reaches the edge you are actually trying to search. A transducer built to tolerate that shallow a mount gives something up in raw depth capability elsewhere, and no listing volunteers which side of that trade it made.
The three awards
The three packages at a glance
| If you want | Consider | Why |
|---|---|---|
| Side-imaging habitat search on most inshore skiffs and kayaks | Humminbird XPLORE 9 | Nine-inch layout built around a matching side-imaging transducer package, for edges and structure beside the boat |
| Chart-led navigation through creek mouths and channel turns | Garmin ECHOMAP UHD2 94sv | Coastal chart package paired with a compatible SideVu transducer, for a reader who ranks mapping detail over side coverage |
| A defined Lowrance system with room to add live sonar later | Lowrance Elite FS 9 | Active Imaging 3-in-1 covers conventional sonar, DownScan and SideScan in one quoted transducer, with a documented expansion path |
On this page
- The quick answer
- The three awards
- The three packages at a glance
- How we chose
- What does "powerful" actually mean for a flats fish finder?
- How much bottom does your cone angle actually cover in shallow water?
- What shallow-water tuning costs you offshore
- The overlooked check: transducer mount height against your hull's actual draft
- The best fish finders for inshore flats fishing
- Humminbird XPLORE 9
- Garmin ECHOMAP UHD2 94sv
- Lowrance Elite FS 9
- Where each package sits on the search-versus-chart trade-off
- Does side imaging work in shallow saltwater?
- Can sonar tell you that a fish is a redfish?
- Can coastal charts tell you the exact depth right now?
- Is live sonar worth adding for flats fishing?
- What belongs in the complete installed price?
- Do you need a flats-specific fish finder, or will a standard one do?
- Frequently asked questions
- Final verdict
- Related reading
- Sources
How we chose
ReefReadyGear does not run a testing programme, and nothing here is presented as a first-hand result. Every specification is drawn from manufacturer product and support pages, plus NOAA charting and tide documentation, verified September 12, 2026. Where a claim is our calculation rather than a published figure, it is labelled as ours with the method shown.
- Transducer mount height and acoustic clearance are checked before screen size or megahertz count, since a sensor that becomes the hull's lowest point is a rigging problem no display fixes
- Side imaging and conventional or down-looking sonar are never compared as if they answer the same question, because they are physically different beams doing different jobs
- Coverage-width math is shown with its method, not published as if it came from a manufacturer's data sheet
- Charted depth is never treated as a live reading under your hull, because a sounding and the water you are floating in right now depend on different information
- Manufacturer shallow-water and range claims are treated as intended-use statements, not guaranteed working distances on your specific water
The grass edge disappears under a patch of wind-ruffled water. A moment ago you could see the pale sand beside it. Now you have a rod in one hand, the skiff sliding sideways in eighteen inches of falling tide, and a screen showing a depth number that tells you almost nothing about where to cast next.
Every fish finder in this price range advertises range in feet, frequency in kilohertz, and a maximum depth rating that reads like a diving watch. None of those numbers describes what happens when the water under your hull is two to four feet deep instead of forty. This guide exists to test whether "more powerful" is even the right spec to be arguing about at that depth.
It is not. In water this shallow, what decides whether a fish finder actually works is whether the transducer can mount high enough to stay useful without becoming the hull's lowest exposed fitting, whether the beam looking straight down is even wide enough to matter at two to four feet, and whether the side-imaging beam, which is a different piece of geometry entirely, reaches the edge you are actually trying to search. A transducer built to tolerate that shallow a mount gives something up in raw depth capability elsewhere. No listing volunteers which side of that trade it made.
This guide publishes the coverage-width math that turns a cone angle into an actual footprint at flats depths, a number nobody selling these units puts on the box, and the thirty-second mount-height check that decides whether a package fits your hull before you get to arguing about screen size at all. There is no defensible universal winner here for every creek, kayak and micro-skiff, and this guide will not pretend otherwise.
What does "powerful" actually mean for a flats fish finder?
In water this shallow, "powerful" is the wrong question. What actually decides whether a fish finder works on the flats is whether the transducer can mount high enough to clear the hull without becoming its lowest point, whether the beam looking straight down is even wide enough to matter at two to four feet, and whether the side-imaging beam, a different piece of geometry entirely, reaches the edge you are trying to search.
A transducer that cannot clear the hull is not a display problem, and no screen upgrade solves it. A poor mounting location can force a different installation altogether, on a kayak, a micro-skiff, a flats skiff or a bay boat alike. Request a mounting plan showing the sensor's actual acoustic clearance and its lowest point relative to the hull before you compare any two units on their screens.
A narrow straight-down cone barely searches anything once the water is two to four feet deep, regardless of the megahertz printed on the transducer. The section below shows the arithmetic, because nobody selling these units publishes it.
Side imaging is a different beam entirely, and it is the mode actually built to search beside the boat. Side-looking sonar answers a different question than conventional sonar and down imaging, which describe what passes beneath the hull rather than beside it. These modes earn their place through the specific task you need them to perform, not through a single combined spec number. Lowrance's explanation of sonar modes describes those differences in full.
Prioritize side imaging for searching adjoining habitat, coastal charts that cover your actual fishing area, and a transducer installation that clears the hull, in that order. Screen size follows your seat or console position. Maximum offshore depth and optional live sonar come last, after those three are settled.
| Your regular fishing situation | First priority | What to avoid buying on impulse |
|---|---|---|
| Clear, extremely shallow sight fishing | A readable chart, simple waypoint controls, unobstructed deck | A live-sonar installation with no defined use |
| Searching grass edges beside a deeper lane | Side imaging and an unobstructed transducer | Maximum-range claims without a local demonstration |
| Revisiting creek mouths and channel turns | Suitable coastal mapping and organized waypoints | A waypoint-only GPS sold as equivalent to detailed charts |
| Examining structure beneath the boat | Conventional sonar and down imaging | Expecting every sonar mode to show the same view |
| Fishing from a compact kayak | Accessible controls, removable mounting, power fit | A large display that interferes with a paddle stroke |
| Fishing from a skiff console | Readability from the actual operating position | Selecting screen size from its diagonal alone |
How much bottom does your cone angle actually cover in shallow water?
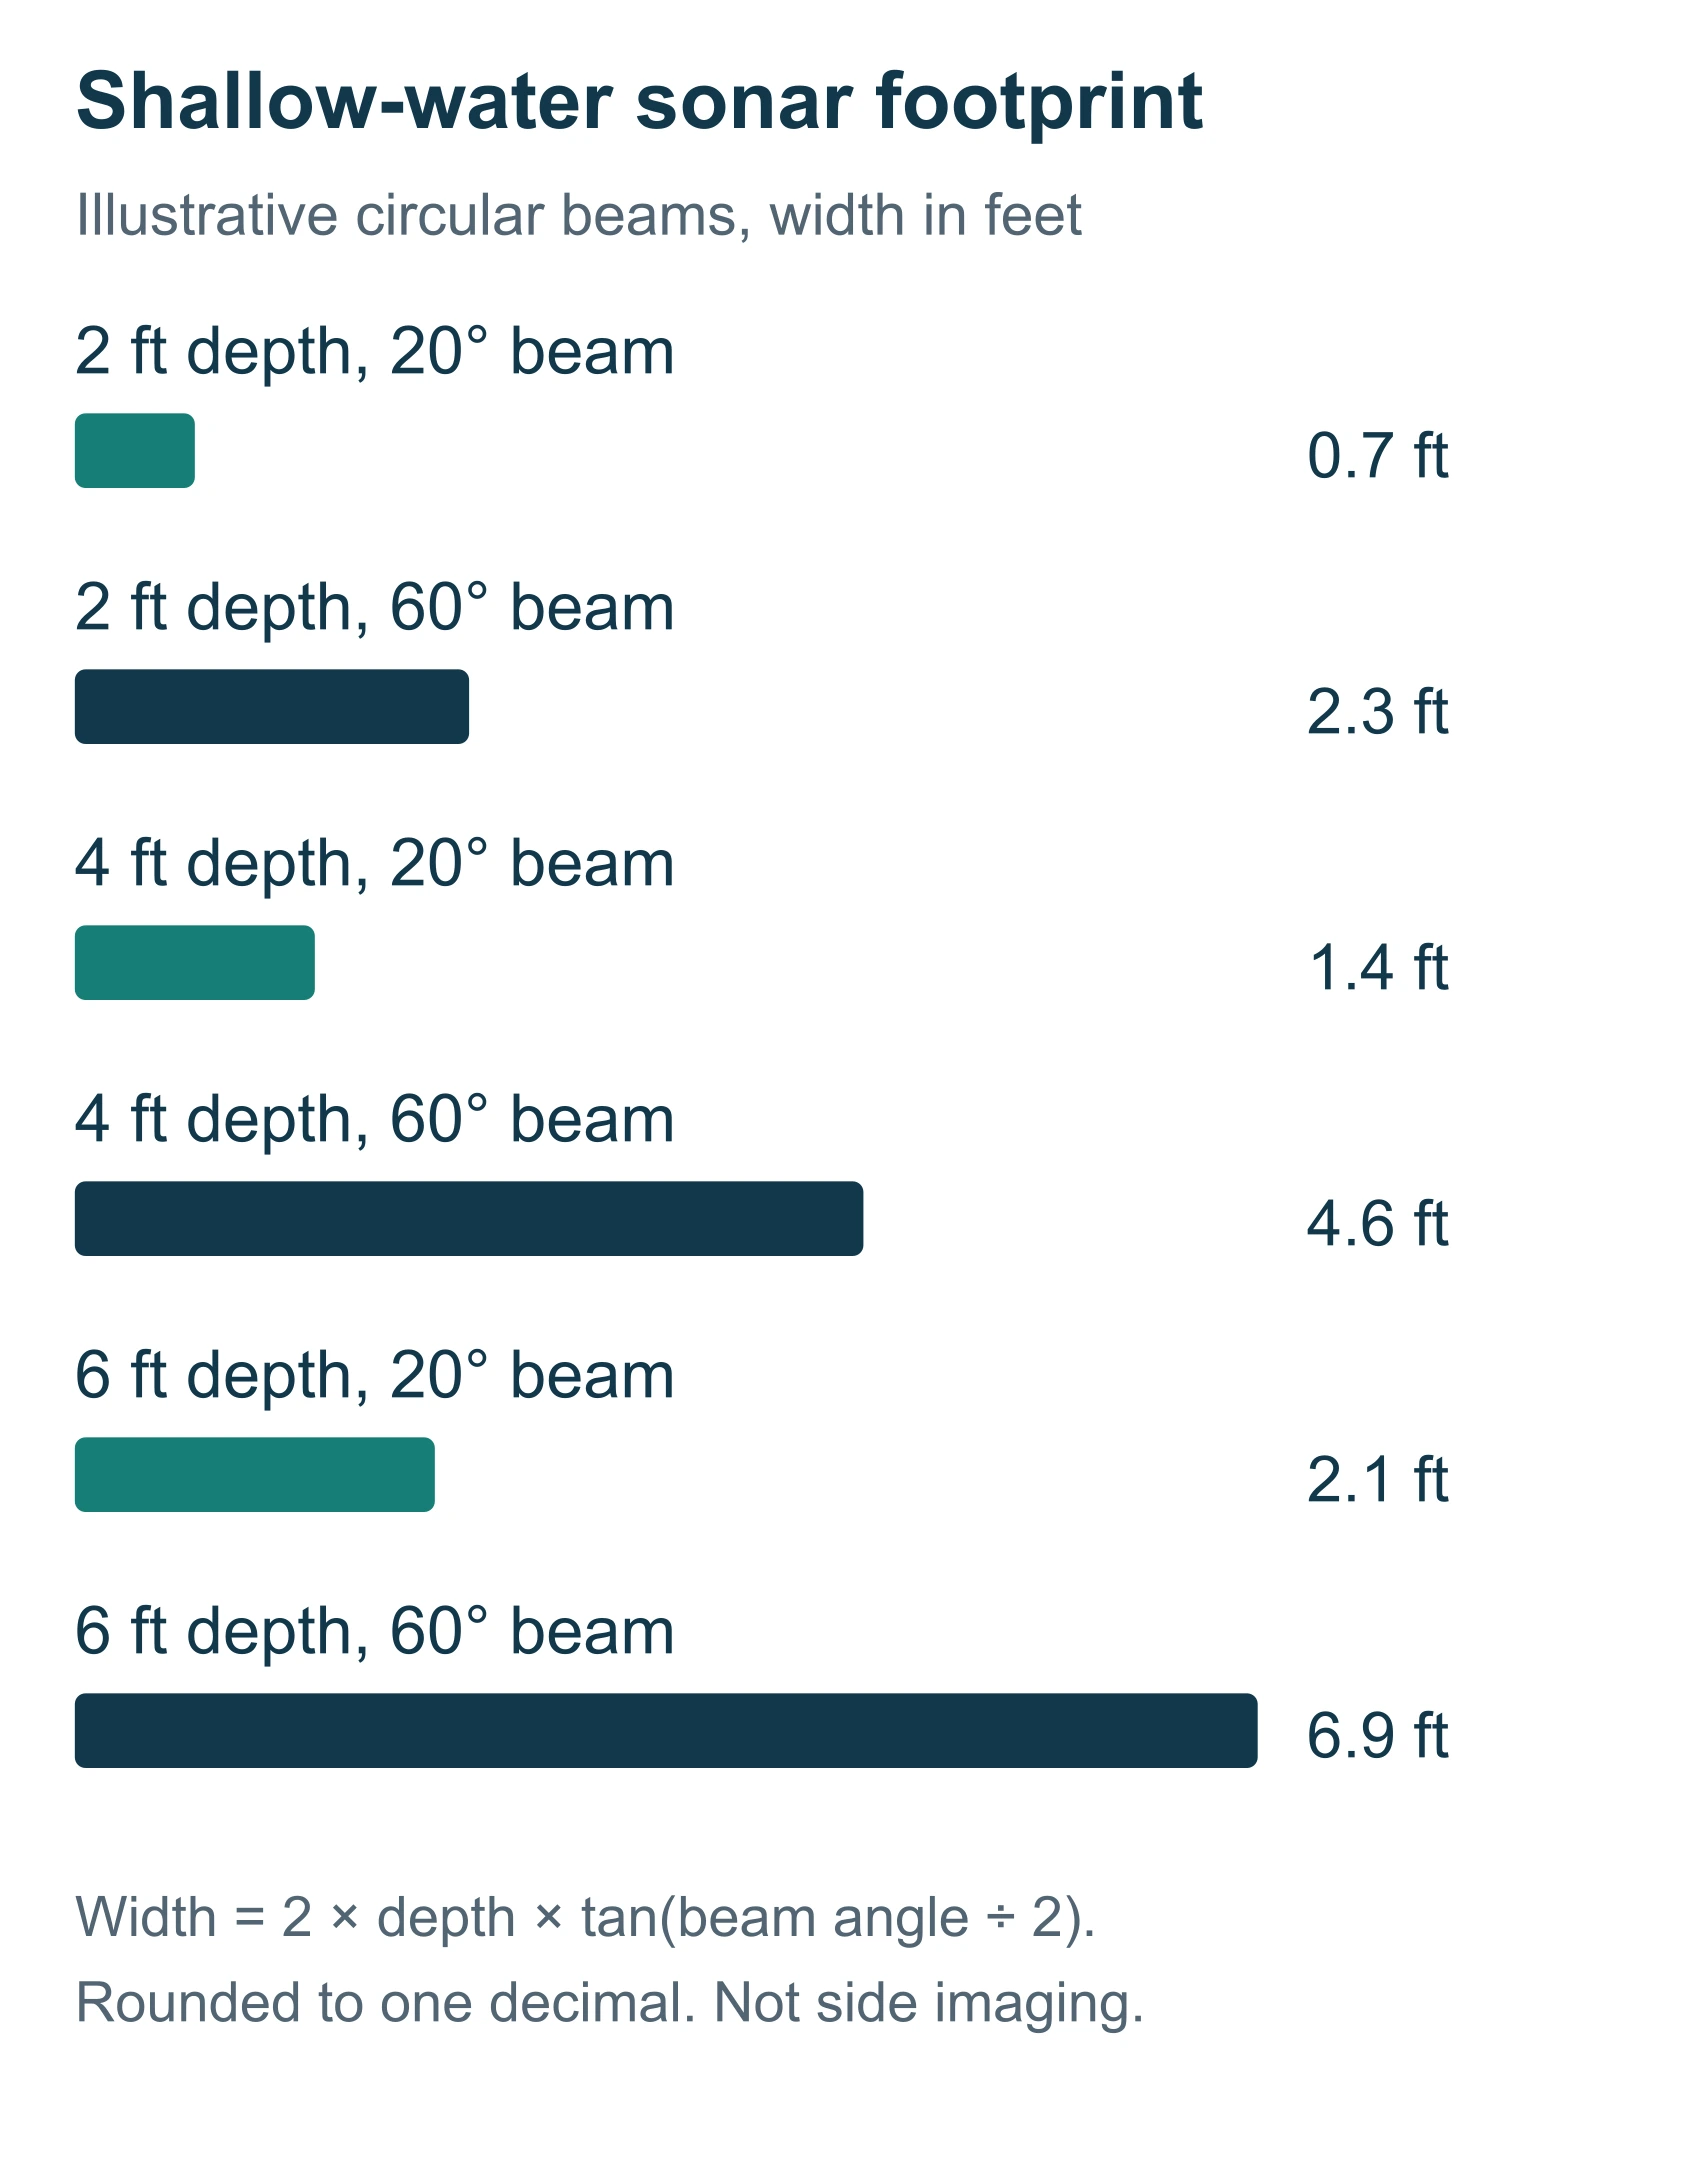
Nobody selling a fish finder publishes this number, because it makes a wide-cone, high-megahertz unit look exactly as narrow as it is once the water gets skinny.
The method
- Take the transducer's cone angle in degrees, the angle a conventional or down-looking beam spreads across, as printed for the specific transducer you are quoting
- Halve that angle, since the beam spreads equally on both sides of straight down
- Multiply the tangent of the half-angle by the water depth, then double the result, to get the diameter of bottom the beam actually illuminates: width equals two times depth times the tangent of half the cone angle
- Recalculate at every depth you actually fish, not the depth in a showroom tank, since the covered width shrinks in direct proportion to depth
This is our calculation, using illustrative cone angles common to saltwater conventional and down-looking transducers, not a published figure for any single reviewed unit. Cone angle changes with frequency and with the specific transducer, and Lowrance's own explanation of sonar modes describes how frequency and beam geometry change what a conventional cone actually shows. Lowrance's explanation of sonar modes
The coverage-width table
| Cone angle | Bottom covered at 2 ft | Bottom covered at 3 ft | Bottom covered at 4 ft | Bottom covered at 6 ft |
|---|---|---|---|---|
| 20 degrees (narrow, typical of higher-frequency conventional beams) | 0.7 ft | 1.1 ft | 1.4 ft | 2.1 ft |
| 60 degrees (wide, typical of lower-frequency or CHIRP-blended beams) | 2.3 ft | 3.5 ft | 4.6 ft | 6.9 ft |
Every figure in this table is our calculation from the standard cone-angle formula, not a maker claim, with the method shown above so you can rerun it for your own transducer's published angle.
Even the wide end of that range covers under five feet of bottom directly beneath the hull in three feet of water. That is the physical reason Humminbird states its side imaging can show objects in water as shallow as two feet: the straight-down cone was never going to search a grass edge ten feet off the beam, and that shallow-water guidance is written for the mode built to look sideways, not the one built to look down. Humminbird's shallow-water guidance
A wider cone at the surface does not mean a wider useful picture on your water. Bottom hardness, water clarity and boat speed all change what a given cone angle actually resolves. The table above measures geometry, not image quality, and it is not a substitute for judging a system by recognizable detail on your own water.
What shallow-water tuning costs you offshore
Every choice that makes a transducer tolerate two feet of water costs something in deeper water, and no listing volunteers which side of that trade it made. A sensor mounted high enough to clear a poling skiff's hull in the shallowest creek you fish sits shallower in the water column than a thru-hull unit chosen purely for offshore depth capability, and a shallower mount can mean losing a usable signal sooner in a chop or at speed than a deeper-set transducer would.
Side imaging searches beside the boat. It does not replace what a narrow conventional cone or down imaging shows beneath it, and a package built around wide side coverage is not automatically the package you would choose to read structure straight down over a channel edge in twenty feet. Lowrance's explanation of sonar modes treats these as genuinely different questions rather than one combined capability.
Choose by which water you will actually run more often. A system tuned for shallow searching makes sense if the flats are the job. A conventional deep-cone setup makes more sense if you split real time offshore. Confirm with the dealer which of the reviewed transducer packages was engineered for which job, rather than assuming one unit does both equally well.
The overlooked check: transducer mount height against your hull's actual draft
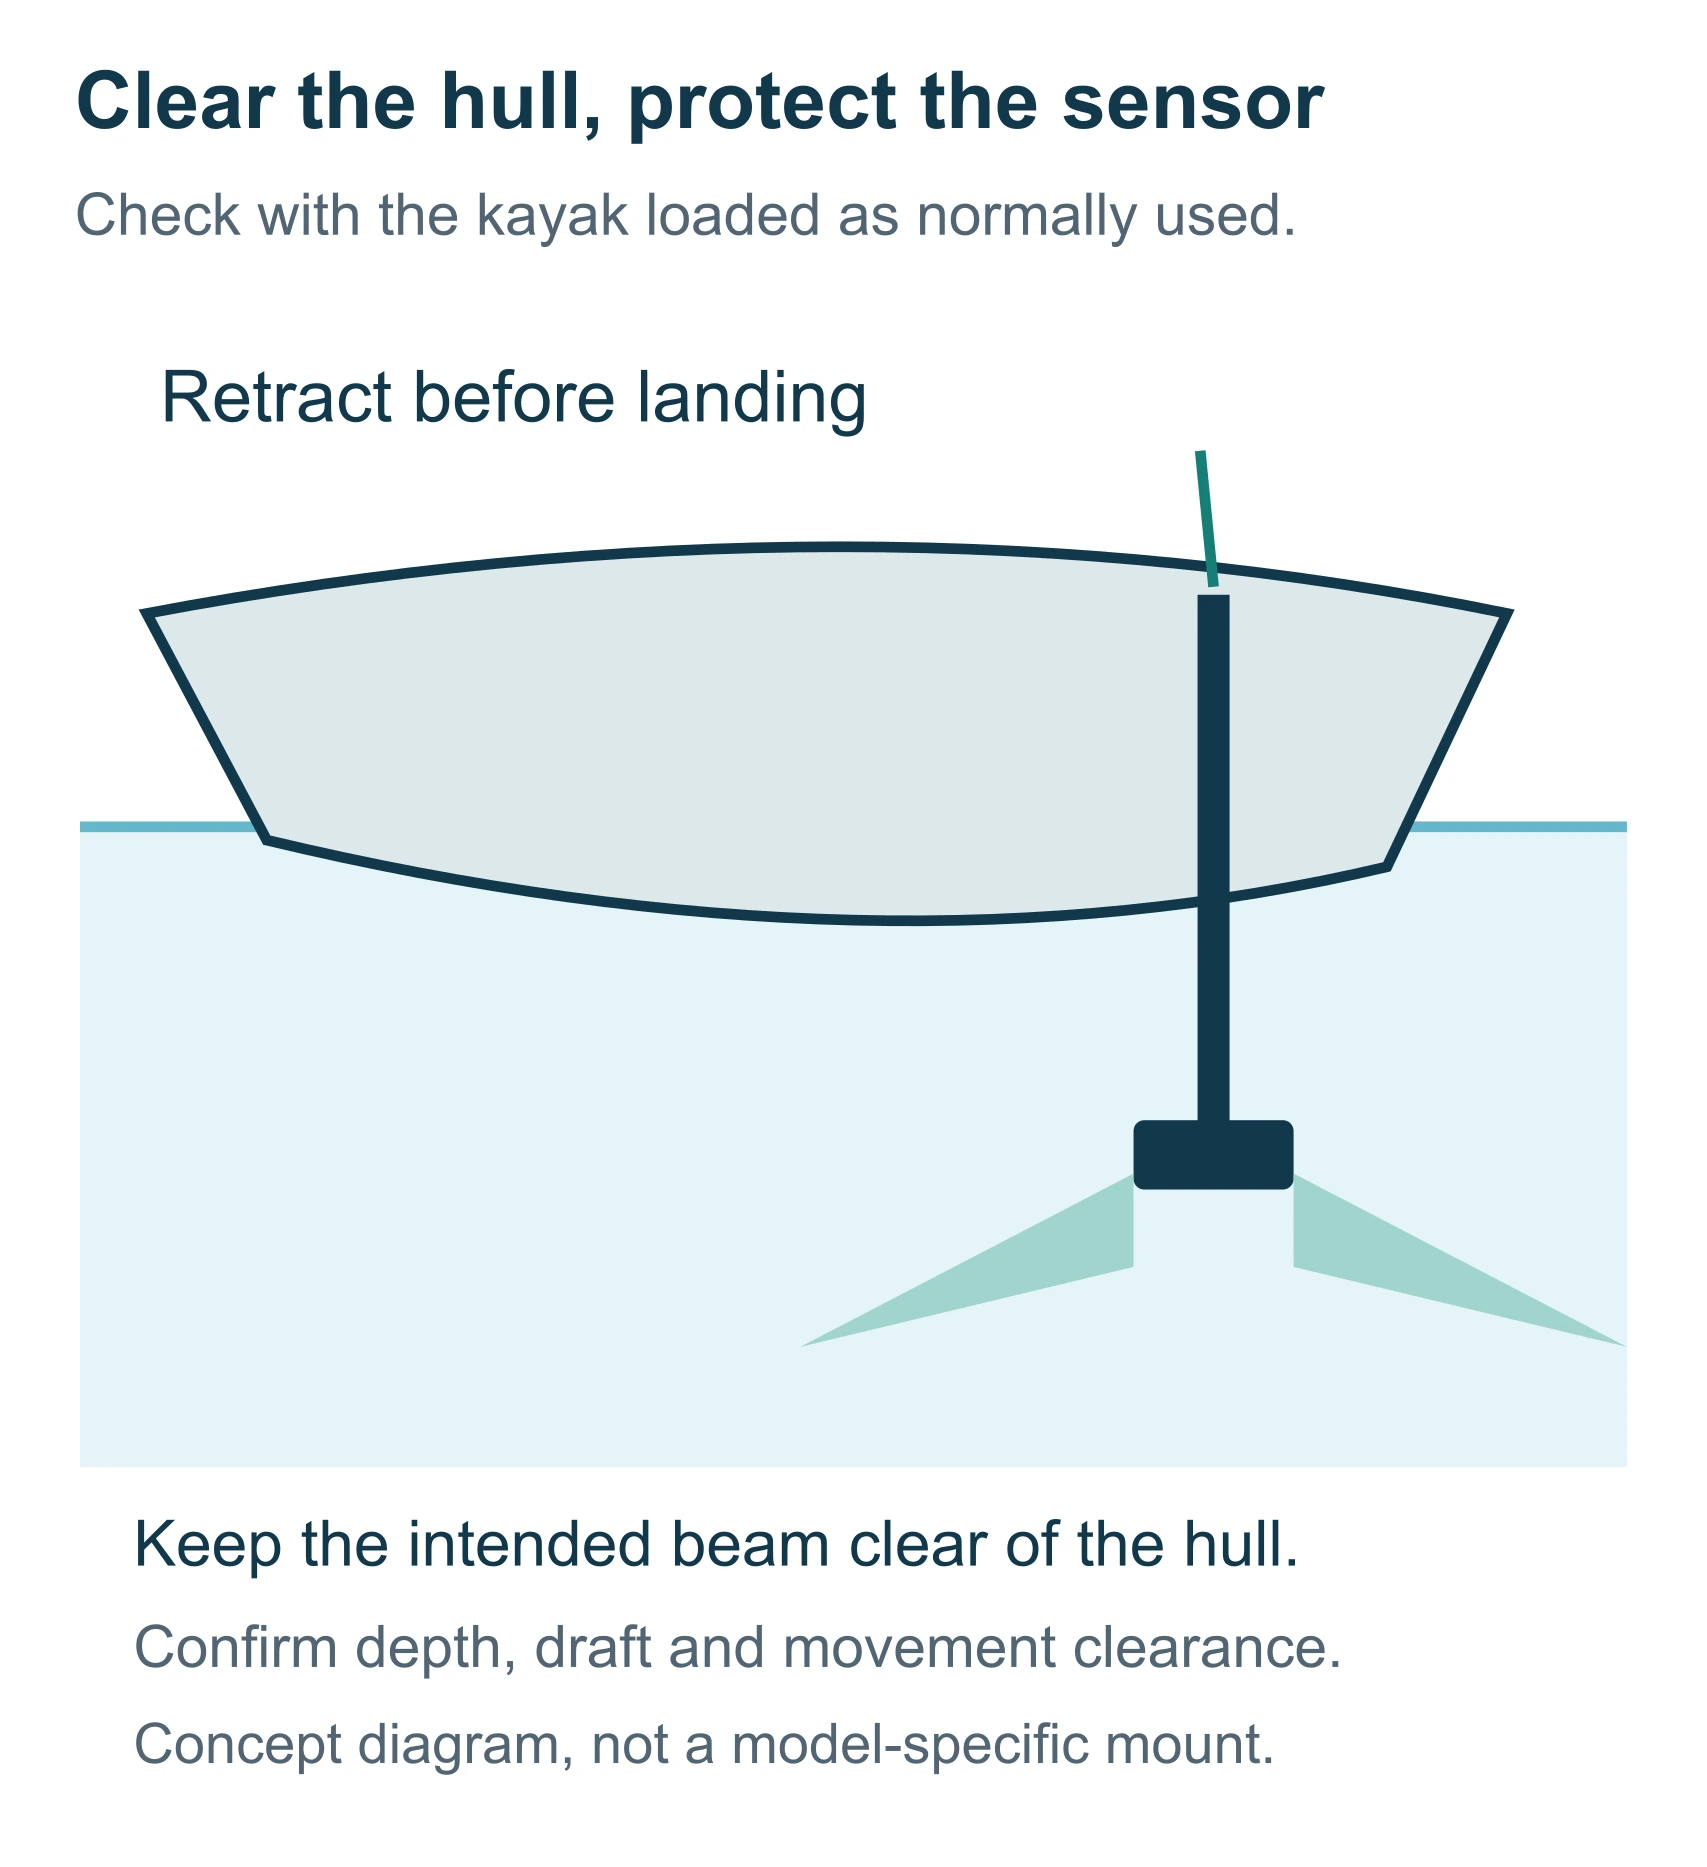
Almost every buying guide for this category stops at screen size and imaging mode. The check that actually decides whether a system works on your specific hull is where the transducer's lowest point sits relative to the boat's own lowest point, and it is rarely mentioned before the sale.
A screen can be moved on a bracket. A poor transducer location may require a different installation altogether. Request a mounting plan showing the actual sensor, its acoustic clearance, and its lowest point relative to the hull.
| Craft | Installation question | Recommended buying response |
|---|---|---|
| Fishing kayak | Can the beam clear the hull without leaving the sensor exposed during beaching? | Demonstrate deployment and removal with the exact mount |
| Micro-skiff | Does the sensor add an exposed low point or interfere with motor positions? | Have the builder or installer approve its location |
| Flats skiff | Does the installation work through expected trim and operating positions? | Review it with the boat loaded as normally fished |
| Bay boat | Can the imaging sensor share space with existing transducers and fittings? | Quote the full arrangement, including cable routing |
Kayak: rehearse the awkward movements
Sit in the rigged kayak on land before fixing the display position. Reach for the paddle, open the tackle storage, lift the landing net, and practice removing the display for transport. Check that you can release or stow the transducer without leaning far outside your normal seated posture.
This fit test is a recommendation, not a claim that every arm mount belongs in the same place. A mounting position that suits a wide motorized kayak may be unsuitable on a narrower paddle boat.
Skiff: include the person holding the rod
Evaluate the screen from the console and from any fishing position where you expect to read it. A display selected at arm's length in a shop may not be the display you want to glance at from farther away.
If the proposed installation needs you to stop fishing and cross the boat to adjust every view, simplify the routine. Save useful layouts, reduce unnecessary panels, and choose controls you can operate comfortably.
Power and connections
Use the exact display and accessory manuals for supply voltage, circuit protection, wiring, and connector requirements. Add the loads of any separate sonar modules to the electrical plan. Never use sonar transmit wattage as the battery's continuous consumption figure.
For compatible-device documentation, start with Garmin's ECHOMAP UHD2 manual, Humminbird's manuals, or the downloads accompanying the exact Lowrance product. Have the installer identify the relevant instructions in the quote.
The thirty-second check almost nobody runs before buying: with the boat on the trailer or the kayak on land, measure straight down from the hull's actual lowest point, the keel, the skeg, or the motor's lowest running position, to the transducer's lowest point once mounted. Compare that figure with the shallowest water you actually plan to run, not the average depth on your usual chart. If the transducer becomes the new lowest point on the hull, change the installation before you finalize the display order, not after the first grounding.
The best fish finders for inshore flats fishing
Category boundary, stated plainly: displays and imaging transducer packages evaluated here for inshore and flats saltwater fishing in roughly two to eight feet of water, where side imaging, coastal chart coverage and transducer clearance matter more than maximum offshore depth. All three are compared as complete systems, not as bare displays, because the transducer and chart package decide most of what the number on the box promises.
Prices and dealer bundles are not included here. Confirm the exact configuration, transducer part number and regional chart coverage with the seller before ordering, since two listings under the same model name can ship with different hardware.
Humminbird XPLORE 9: Habitat Search, Side-Imaging Led
Check Humminbird XPLORE 9 on Amazon
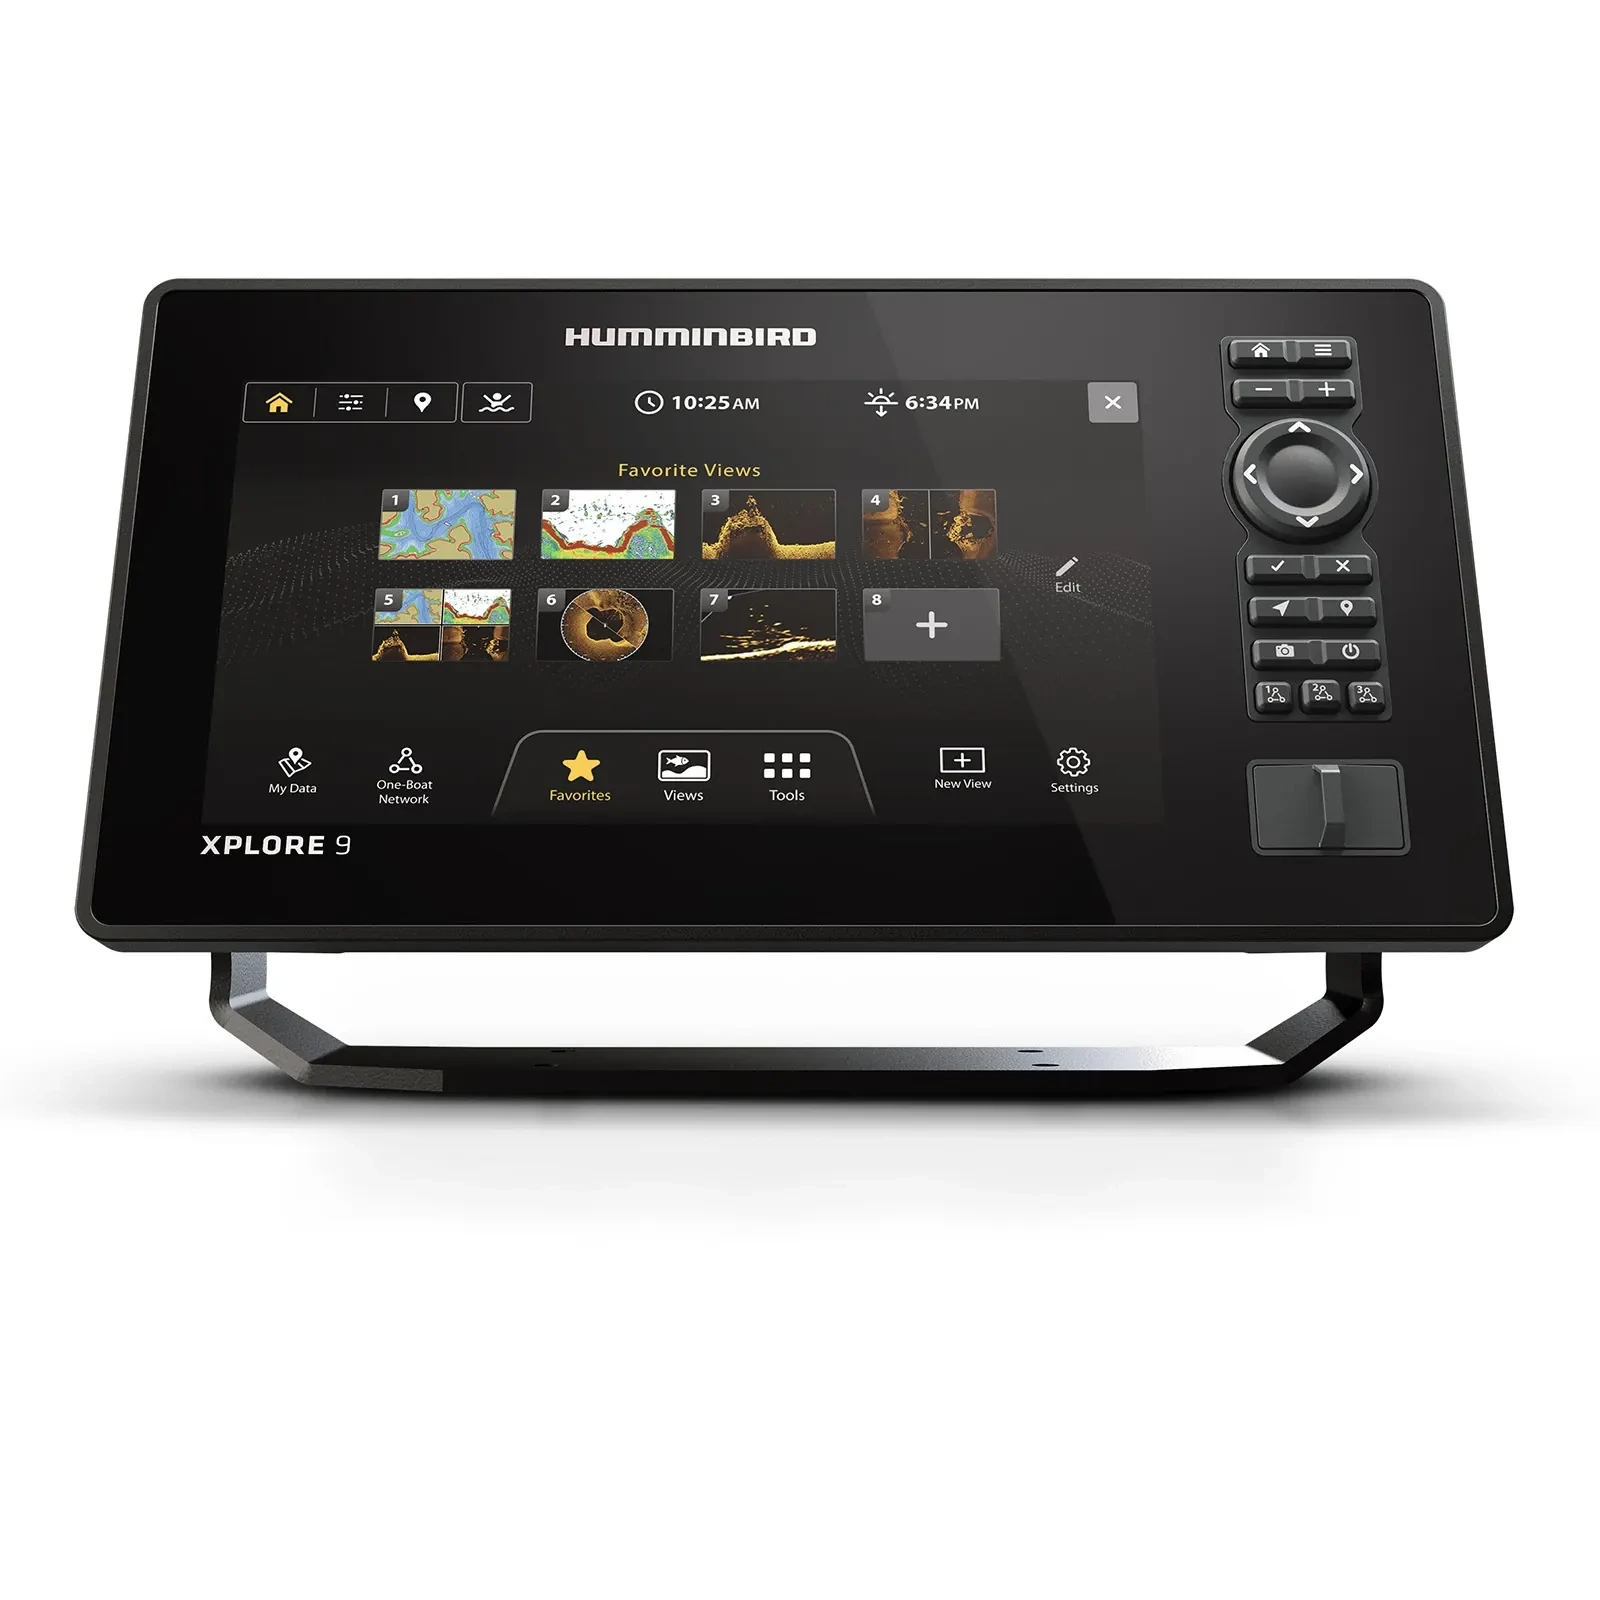
The XPLORE 9 takes the habitat-search award because the side-imaging transducer is matched to the display and ordered with it, so the decision is about a specified imaging package rather than a nine-inch screen plus a separate guess. That distinction matters most in two to eight feet of water, where the beam looking straight down covers only a narrow strip of bottom and the grass edge you want sits off to one side. The nine-inch layout leaves enough room to judge a chart-and-sonar split before committing to a larger installation later.
| Display size | 9 in, confirmed on the reviewed product page |
|---|---|
| Primary role | Side-imaging habitat search |
| Transducer package | Matching side-imaging transducer, ordered with the display |
| Chart coverage | Confirm regional coastal mapping at the time of order |
| Compatibility | Confirm against Humminbird's compatibility resources before adding accessories |
Source: Humminbird XPLORE product page, reviewed September 2026. Exact side-imaging range, cone angle and installed weight are not published on the reviewed listing; confirm with the dealer before ordering.
Why the matched transducer is the real purchase
The nine-inch display is the part you look at, but the matched side-imaging transducer and the regional mapping are the parts that decide what appears on it. Because Humminbird specifies that transducer with the display rather than selling it separately, the shortlist question becomes whether the package suits your hull, not whether you guessed the right part number. Confirm regional coastal mapping at the time of order all the same, since the reviewed listing does not settle it for your stretch of coast.
Ask for the off-to-the-side demonstration
Request a complete installed quote and have the dealer mark a target beside the boat, not just a straight-down return. Ask to see a full-width sonar view and then the split view you actually expect to fish with.
Check any accessory against Humminbird's compatibility resources rather than assuming every product carrying one brand name connects to every other. Exact side-imaging range, cone angle and installed weight are not published on the reviewed listing, so those are dealer questions before the sale rather than after it.
Where the bill grows after the display
The display is only part of the purchase, and transducer placement is the part that can quietly decide whether the system suits the boat at all. Optional accessories are the other pressure on the quote, and they expand it well past the fishing task you started with.
Best for. The angler whose main problem is identifying edges, hard structure and habitat changes alongside the boat.
Skip it if. Your fishing is mostly straight-down structure work in deeper water, where a conventional or down-imaging-led package answers the actual question better.
Garmin ECHOMAP UHD2 94sv: Chart-Led Coastal Fishing
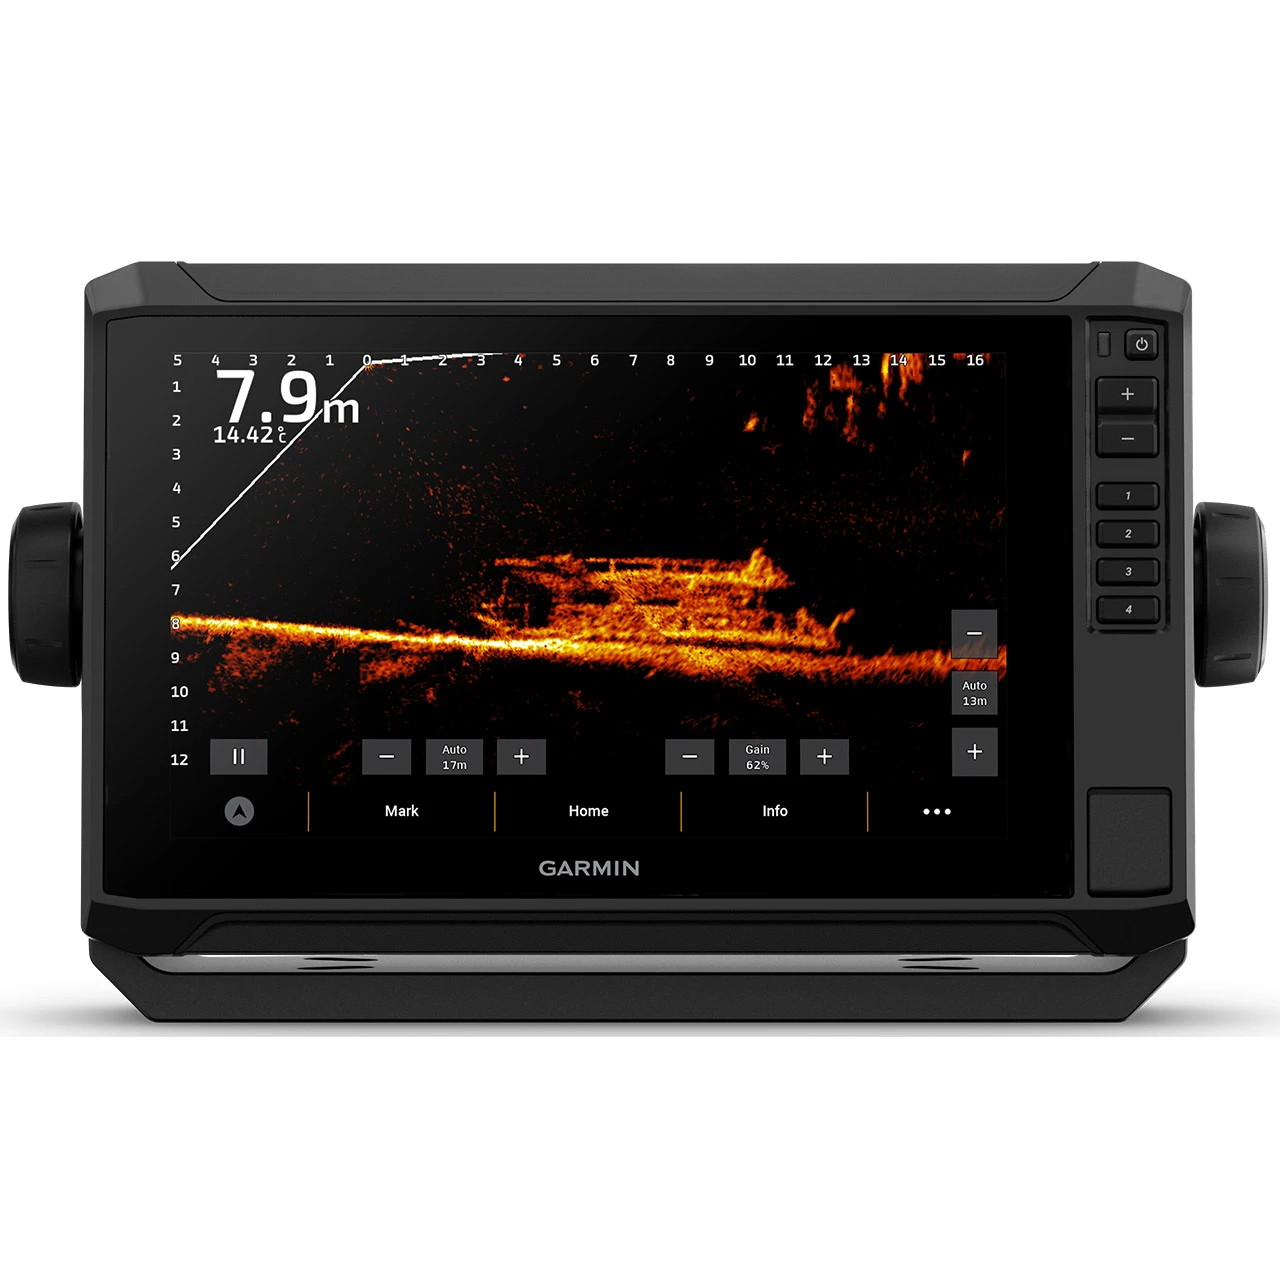
The 94sv earns the chart-led award because it lets you build the purchase around a named coastal chart package instead of a generic screen size. For an angler picking a route through creek mouths and channel turns, that presentation is the daily job, and side-imaging range is the secondary one. It also rewards anyone already running compatible Garmin marine equipment, which is the one case where brand matching is a functional argument rather than a habit. The catch is that the pairing only holds when the compatible SideVu transducer is written onto the order.
| Display size | 9 in, inferred from the "94" model designation; confirm the exact diagonal on the order |
|---|---|
| Primary role | Coastal chart and sonar combination |
| Transducer package | Compatible SideVu transducer, must be explicitly listed on the order |
| Chart coverage | Coastal chart package, region to be confirmed |
| Compatibility | Best leveraged with existing compatible Garmin marine equipment |
Source: Garmin ECHOMAP UHD2 94sv product page, reviewed September 2026. The exact transducer part number and screen diagonal should be confirmed against the specific order rather than assumed from the model name alone.
Why the order sheet decides this purchase
Similar product names and differing bundles make careful order checking part of buying this unit. The screen diagonal is inferred from the "94" in the model designation and the transducer part number is not implied by it at all, so both belong on the quote in writing.
Check the display and transducer pairing against Garmin's transducer selection guidance before agreeing to anything. A display-only offer is not the same purchase as a complete sonar bundle, and a transducer chosen for another fishing style may not match the installation you want on a shallow-running craft.
Test the chart on your own water, at your own zoom level
Open your actual launch, access channel and fishing area on the unit before buying. Compare how much useful information survives at the zoom level you can read from the seat or the console, rather than crediting a chart package for simply drawing more lines.
Best for. The angler selecting charts and sonar together who ranks coastal mapping detail above side-imaging range.
Skip it if. The quote pairs the display with a transducer selected for a different fishing style, or the regional chart package cannot be confirmed for the coast you fish.
Lowrance Elite FS 9: A Defined Lowrance System, Structure Search With Expansion Room
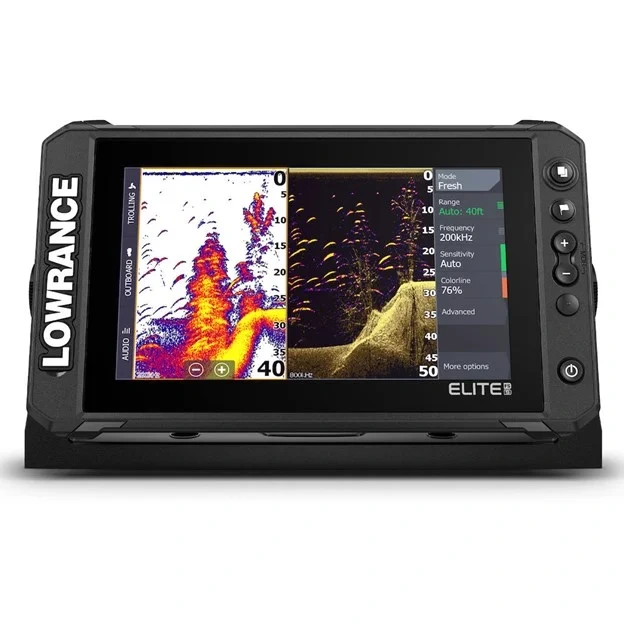
The Elite FS 9 takes the defined-system award on the strength of one component: the Active Imaging 3-in-1 transducer, which covers conventional sonar, DownScan and SideScan in a single quoted unit instead of three separate purchases. That keeps the structure-search side of the decision to one part number, which is rarer than it sounds in this category. Lowrance also documents a path to add forward-looking live sonar later, so the expansion question can be deferred rather than paid for now. The nine-inch diagonal is inferred from the "FS 9" designation and should be confirmed on the order.
| Display size | 9 in, inferred from the "FS 9" model designation; confirm the exact diagonal on the order |
|---|---|
| Primary role | Structure search with room for compatible expansion |
| Transducer package | Active Imaging 3-in-1, conventional sonar, DownScan and SideScan in one unit |
| Chart coverage | Regional mapping varies; confirm local coastal coverage separately |
| Compatibility | Documented expansion path to Lowrance live sonar |
Source: Lowrance Elite FS 9 product listing, reviewed September 2026. The listing describes expansion possibilities; a compatible feature is not automatically an included one.
One transducer, three jobs, one line on the quote
Bundling conventional sonar, DownScan and SideScan into the Active Imaging 3-in-1 gives you a clear package to compare against the others, because you are weighing complete systems rather than a display against a display. It is worth a close look when the interface simply feels easier to operate from your fishing position, which is a legitimate reason to choose a unit and a difficult one to judge from a listing.
A compatible feature is not an included one
Lowrance's Elite FS 9 package listing describes forward-looking live sonar as compatible, not bundled, and expansion can require equipment beyond the display and the supplied transducer. Buy the base system around the fishing you do now.
If live sonar is a later possibility, write down what that purchase would actually require and leave it out of the initial decision until you can name the problem it solves. Ask the dealer to show the exact charts and the supplied sonar functions before any conversation about optional upgrades starts.
Regional mapping is the weak point to check
Mapping coverage differs by region, and an international listing is not proof that your local coastal detail is included. Confirm the coverage for the exact water you fish, separately from the transducer conversation.
Best for. The angler who wants conventional sonar, DownScan and SideScan in one quoted transducer with a documented upgrade path.
Skip it if. Your local coastal chart coverage cannot be confirmed for the exact region you fish.
Where each package sits on the search-versus-chart trade-off
| Package | Search emphasis (side imaging) | Chart-led navigation | Expansion path | Where it sits |
|---|---|---|---|---|
| Humminbird XPLORE 9 | Strongest, built around the side-imaging package by default | Confirm regional coverage separately from the display | Compatible Humminbird accessories, confirmed case by case | Leans hardest toward habitat search |
| Garmin ECHOMAP UHD2 94sv | Requires a compatible SideVu transducer explicitly listed on the order | Strongest, the coastal chart package is the headline feature | Garmin marine ecosystem, if already aboard | Leans hardest toward chart-led navigation |
| Lowrance Elite FS 9 | Included via Active Imaging 3-in-1, conventional, DownScan and SideScan | Regional mapping varies; confirm local coverage before buying | Documented path to add live sonar later | Balanced, with the clearest expansion route |
No package leads on every axis, and that is the point of comparing them as complete systems rather than as screen sizes. The right column is a starting shortlist, not a ranking, because the axis that matters most is the one that matches your actual fishing.
Does side imaging work in shallow saltwater?
Yes, side imaging can help inspect shallow habitat beside the boat when the transducer has a clear acoustic view. Useful range depends on the installation and conditions, so a manufacturer's distance claim is not a guaranteed working range. Judge a system by recognizable detail on your water, not the widest selectable setting.
Humminbird states that its side imaging can show objects in water as shallow as two feet. That establishes an intended shallow-water application, not a promise that every transducer, bottom type and sea state will produce the same picture. Humminbird's shallow-water guidance
Start with an edge you can identify independently
For a first setup session, choose a permitted, familiar area where you can identify an edge without relying entirely on the screen. Make a controlled pass alongside it. Save the image and your settings. Repeat with a different range, keeping the other settings as similar as practical.
You are asking a narrow question: which setting makes that particular edge easier to interpret? You are not proving that one setting works on every flat.
| Trial entry | What to record | Why it belongs in your notes |
|---|---|---|
| Habitat | Visually confirmed edge, suspected shell, unknown bottom | Separates observation from interpretation |
| Water depth | Displayed depth and any offset applied | Gives context to the image |
| Side range | Setting for each side | Makes repeat comparisons meaningful |
| Movement | Direction, approximate speed, straight pass or turn | Identifies changes between runs |
| Water conditions | Chop, clarity, observed current | Records the conditions of the comparison |
| Transducer | Model, position, motor position | Helps explain blockage or inconsistent results |
Read shadows and texture without inventing certainty
Side imaging builds a picture from successive sonar returns. Its water-column display, bottom returns and shadows need interpretation. It is not an underwater photograph with automatic habitat labels. Humminbird explains the display arrangement and tools such as range lines in its side-imaging guide.
Use restrained waypoint names: edge candidate, hard return, or possible shell. Upgrade the label only when you have independent evidence. A patch worth another cast does not need a false species identification to be useful.
Avoid the maximum-range trap
A very wide view is attractive in a showroom. On your boat, the useful setting is the one that lets you distinguish the detail you need.
Try a narrower view before increasing sensitivity in response to an unclear image. Then compare a saved pass. Change one setting at a time so you know what helped. This is a recommended troubleshooting method, not a universal factory preset.
If one side stays poor while the other looks useful, examine the installation before declaring the display inadequate. An outboard leg or other obstruction can interfere with a side-looking beam. Lowrance discusses motor clearance in its sonar setup explanation. Follow the boat and motor operating instructions when checking positions, and never create a new operating problem just to improve a screen image.
Can sonar tell you that a fish is a redfish?
A plausible sonar mark is not enough to confirm a redfish. Treat it as an unidentified target unless a linked observation or catch supplies independent evidence. Use the image to decide where to investigate or cast, and keep species claims separate from what the screen actually establishes.
That is the evidence standard used throughout this guide. Neither a product photograph nor an angler's confident interpretation substitutes for confirmation of the particular target.
The same care applies to bottom labels. An interesting return can justify saving a waypoint. It does not automatically establish living grass, shell condition, or whether that spot holds feeding fish at the time you arrive.
Can coastal charts tell you the exact depth right now?
No. A charted depth refers to a defined vertical reference and underlying survey information; it is not a live measurement beneath your hull. Present water level, chart uncertainty and local changes affect clearance. Use charts with current observations and appropriate local water-level information, while allowing a margin for uncertainty.
NOAA explains that depths on its tidal-water charts are referenced to local Mean Lower Low Water. That reference must be understood before comparing chart soundings with a tide height. NOAA's explanation of hydrographic water-level measurements
As a simplified arithmetic example, a charted depth of 2 feet plus a water level of 1 foot above the same datum gives 3 feet before accounting for uncertainty and other effects. It is not a clearance guarantee, and a water level from a distant station may not represent the creek you are entering.
Chart detail also has an evidence history. NOAA's explanation of chart accuracy describes differences in survey age, position accuracy, depth accuracy and seafloor coverage. Its older publication date does not justify repeating historical coverage figures as present-day statistics; the relevant buying lesson is to inspect the quality and source of the information.
Keep tide height and current separate
Water level helps frame access. Current describes moving water. High or low water does not universally coincide with slack current, and NOAA specifically warns against that shortcut. NOAA's tide and current FAQ
For a trip plan, record the relevant local water-level information and the relevant current information separately. Then compare predictions with what you can observe. A chartplotter can organize your trip, but a tidy screen does not remove local uncertainty.
Check the coast you actually fish
- Open the launch and the entire intended access route on the proposed chart package
- Confirm the region, update terms, and whether the quoted price includes the required card or license
- Ask which layers are official chart information and which are supplemental or user-generated
- Inspect the detail at a usable zoom level rather than accepting a distant overview
- Keep an independent means of obtaining the chart and local conditions appropriate to the trip
Is live sonar worth adding for flats fishing?
Live sonar is worth considering when you have a specific need to inspect targets or presentations in a chosen direction. It is not a prerequisite for fishing shallow flats. First solve chart coverage, conventional imaging and installation. Add live sonar only when its extra transducer, mounting and power requirements fit your routine.
Lowrance describes forward-looking live sonar as a different view from its side-looking and downward-looking modes. That difference supports buying it for a defined task, not assuming it replaces every other sonar function. Lowrance's mode comparison
Before buying, rehearse the complete movement: aim the sensor, hold the boat where you need it, cast, and stow the hardware before moving. If the proposed arrangement makes those actions awkward, ask for another mounting demonstration before spending more.
What belongs in the complete installed price?
The complete price should cover the display, specified transducer, suitable coastal charts, mounting, and the electrical components required by the equipment manuals. Include installation labor where needed. Keep optional sonar systems separate so you can compare the cost of solving today's fishing problem before paying for possible future uses.
| Item | Why it may be needed | When to decline the upgrade |
|---|---|---|
| Display and matching imaging transducer | The working sonar package | Decline a mismatched bundle |
| Appropriate coastal chart coverage | Mapping the area you fish | Decline a duplicate license you cannot use |
| Approved mount and installation | Physical fit and acoustic clearance | Decline an unverified bracket substitution |
| Electrical components | Supply, protection, and connections specified by the manuals | Decline oversized capacity justified only by transmit wattage |
| Optional live-sonar system | A separate, defined fishing task | Decline if the base system already solves the problem |
| Installer demonstration | Shows operation and stowage on your boat | Ask for this before accepting the finished installation |
Do not compare a discounted bare display with a fully installed competing system. Ask every seller for the same scope. The cheapest screen can become the more expensive purchase if its included transducer or charts do not suit the boat.
Do you need a flats-specific fish finder, or will a standard one do?
Not every inshore angler needs a dedicated side-imaging or shallow-tuned package, and the honest answer for some trips is a basic chartplotter, not a bigger sonar bundle. If your fishing is clear, extremely shallow sight-casting, where you spot fish before a screen would ever mark them, the priority is a readable chart, simple waypoint controls and an unobstructed deck, not a live-sonar installation with no defined use.
A waypoint-and-chart unit with no imaging at all is enough when your fishing is sight-casting clear shallows and revisiting known spots by GPS position rather than searching new water. Skip side imaging entirely here, and put the saved cost toward chart coverage and a mount that stays out of the way.
A conventional-plus-down-imaging package, without side imaging, is enough when you mostly examine structure directly beneath the boat, docks, bridge pilings, channel drop-offs, rather than searching adjoining grass edges from a moving boat. Side imaging solves a searching problem you may not have.
A full side-imaging and chart package, the three systems reviewed above, earns its cost when finding and returning to unmarked edges and structure beside the boat is a recurring part of how you fish, and when you have already confirmed the transducer clears your hull.
This is not the answer that sells the bigger display, and it is the one this guide owes you before you spend on side imaging you may not need. Decline the mismatched bundle, decline the duplicate chart license, and decline the live-sonar add-on if the base system already answers the question you actually have.
Frequently asked questions
Do I need a nine-inch screen on a flats kayak?
No. Choose it only if the display and mount fit and the layouts are readable from your seat. A compact display with a clear full-screen view can be a better purchase than a larger unit that crowds the working area. Test the actual layout before deciding, with a rod already in one hand.
Will a coastal chart show every oyster bar?
No, and do not assume complete coverage of every obstruction. Chart information has source and survey limitations described in NOAA's chart-accuracy documentation above. Treat a missing symbol as an absence of mapped information, not proof that a route is clear, and keep a margin for uncertainty on any water you have not run before.
What is the best side-imaging range for grass flats?
There is no verified universal setting to offer here. Begin with a view that shows recognizable detail on known habitat, then compare narrower and wider settings on a repeat pass. Keep depth and range in your saved notes so the result is useful the next time you fish that edge.
Does a higher-megahertz transducer see better in shallow water?
Not automatically. Frequency changes resolution and cone angle, but the coverage-width math above shows that even a wide cone covers only a few feet of bottom at two to four feet of depth. Side imaging, not a higher frequency, is the mode built to search wider than that in shallow water.
Should I buy the same brand as my trolling motor?
Only give that preference weight when a documented integration solves a task you actually use. Confirm the exact motor, display, accessory and software requirements before assuming compatibility. Shared branding alone does not establish that two products from the same company actually work together.
Should I buy the same brand as my trolling motor, without any documented integration to justify it?
No. Shared branding alone is not a functional reason to choose a display, and a mismatched pairing can still leave you troubleshooting a connection that was never designed to exist. Confirm the specific integration with the dealer before it factors into your decision.
Which package should I buy first?
Start with the Humminbird XPLORE 9 if side-imaging habitat work drives the purchase. Put the Garmin ECHOMAP UHD2 94sv beside it for a chart-led coastal setup, and the Lowrance Elite FS 9 beside it for a defined Lowrance installation. Let local chart detail, usable controls, and the approved transducer position decide the final order.
Final verdict
The megahertz count and maximum-range claim on a flats fish finder's box are not the shallow-water spec they are marketed as. Cone-angle geometry alone covers only a few feet of bottom at two to four feet of depth, which is why side imaging, a genuinely different beam, exists and why transducer mount height decides more than screen size before you get near a purchase. The Humminbird XPLORE 9 is the strongest starting shortlist for habitat search beside the boat, the Garmin ECHOMAP UHD2 94sv for chart-led coastal navigation, and the Lowrance Elite FS 9 for a defined Lowrance system with room to add live sonar later. If your fishing is sight-casting clear shallows rather than searching unmarked edges, a basic chartplotter may be the more honest purchase than any of the three. Run the thirty-second mount-height check against your hull's actual draft before you order any of them, not after.
Related reading
Sources
Specifications on this page were taken from manufacturer product and support pages and the government sources below, consulted September 2026. Prices and specifications change; confirm current figures before buying.
- Humminbird XPLORE product specifications, humminbird.johnsonoutdoors.com, reviewed September 2026
- Humminbird compatibility resources, humminbird.johnsonoutdoors.com/us/support/compatibility
- Humminbird side-imaging guide, humminbird.johnsonoutdoors.com/us/learn/imaging/side-imaging
- Humminbird side-imaging shallow-water performance guidance, humminbird-help.johnsonoutdoors.com
- Humminbird manuals, humminbird.johnsonoutdoors.com/us/support/manuals
- Garmin ECHOMAP UHD2 94sv product page, garmin.com, reviewed September 2026
- Garmin transducer selection guidance, support.garmin.com
- Garmin ECHOMAP UHD2 owner's manual, garmin.com (webhelp documentation)
- Lowrance Elite FS 9 Active Imaging 3-in-1 product listing, lowrance.com, reviewed September 2026
- Lowrance sonar basics explanation, lowrance.com/en-au/sonar-basics
- Lowrance sonar setup and motor clearance explanation, lowrance.com/en-au/news-videos/blog-sonar-basics
- Lowrance chartplotter and sonar mode comparison, lowrance.com/en-gb/chartplotter-basics
- NOAA, hydrographic survey and water-level measurement explanation, nauticalcharts.noaa.gov
- NOAA, nautical chart accuracy explanation, nauticalcharts.noaa.gov/updates
- NOAA, tide and current FAQ, tidesandcurrents.noaa.gov/faq.html
Join The ReefReady Community
Get saltwater Fishing Guides, expert Buyers Guides, equipment recommendations, marine electronics insights, and practical gear tips delivered to your inbox.
No spam. Unsubscribe in one click.